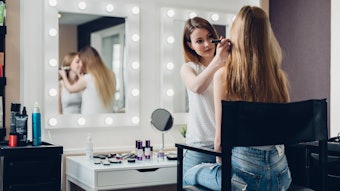
As clients age, especially women over 50, they either entirely give up on wearing makeup or are frustrated with the results. Aging brings many changes to the face and the skin. What an amazing opportunity skin care professionals and makeup artists have to help women of all ages feel and look their best. It is so rewarding to see firsthand not only the physical transformation, but also the change in a client’s emotions as she discovers how easy it is to bring out her features.
In this age-defying instructional makeover on Lin Nicolet, a 52-year-old grandmother and mother of four, some very simple techniques will be used to help bring back the client who either has given up on makeup entirely or is possibly struggling with the aging process. Your job is to help keep it simple by educating and equipping clients with the right products, tools and techniques so that they can recreate what you have taught them with ease. Never underestimate the power of helping someone discover her personal beauty. All of it matters and makes a difference in getting clients one step closer to healthy self-esteem.
For Lin’s makeup look, the goal was for it to reflect her natural beauty by creating an elegant makeup application that brought all the attention to her stunning eyes. The cheek and the lip area were kept in check, and made softer and more neutral. Overall, this look is very modern and fresh.
Step 1: Apply a makeup primer all over the client’s face using a synthetic foundation brush. A primer will help smooth out any minor imperfections on the skin, as well as help the makeup last longer. You will find you do not have to use as much foundation.
Step 2: Using a small concealer brush, apply an eyelid primer all over the eyelids. It is also fine to use a concealer to even out the tone in place of a eyelid primer. If the client has a problem with eyeshadows not lasting a long time, an eyelid primer may be the solution.
Step 3: Apply a concealer to the under-eye area using a small, oval brush, making sure the texture isn’t too heavy, but is thick enough to even out under-eye discoloration. Blend the concealer well with a latex-free cosmetic sponge. Always use latex-free sponges in case clients have allergies.
Step 4: Select a foundation according to skin type and tone. With Lin, a liquid mineral makeup was applied using a foundation brush because she has normal-to-dry skin. Start in the center of the face where people have the most discoloration; apply the foundation, working your way toward the client’s hair line and blending out.
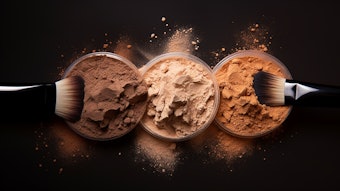
Step 5: Once the skin tone is evened, use a kabuki brush and apply a pressed mineral powder to set everything. Do this before applying any color.
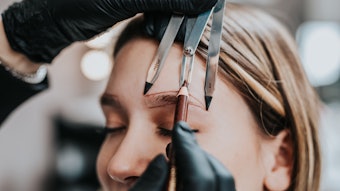
Step 6: Many women over 50 do not have full eyebrows and, in some cases, may have no hair growth. Lin does not have any eyebrow hair from the mid-arch outward. The following eyebrow technique can be easily used to re-create a client’s eyebrows, and is very helpful to teach when doing oncology makeup. Simply determine what eyebrow pencil color to start with, making sure you never go too dark. Hold the eyebrow pencil straight up along the side of the nose and where the eyebrow naturally would begin, place a dot there. Then place dots where the natural arch and end of the eyebrow would be. Stand back, and make sure you have at least three dots as a reference point. Using short, feathering strokes with the pencil, re-create the eyebrow following the dots. To soften the eyebrow pencil, blend up and out with a mascara spooly. Follow this with some eyebrow powder, using a small angled brush, and set with an eyebrow wax to hold and give some sheen to the eyebrows.
Step7: Next, apply a shimmering copper eye shadow on the eyelid with a sable eye shadow brush above the crease of the eyes. Then apply a creamy luminizer under the arch of the brow, using a bone-colored eye shadow over it to soften the look. With the same color of luminizer, use a small synthetic detail brush to apply it in the very inner corner of the eyes around the tear ducts. Add a touch of luminizer on the bottom-center of the eyelids. Basically, you are highlighting under the arch of the brow, the inner corner of the eye and the very center of the bottom eyelid. Select a dark brown eye shadow to apply to the very outer corner of the eyes, blending it up and in. Be careful not to extend it out too far or down, which can be aging on older clients.
Step 8: Apply a dark brown eye pencil from the inner corner of the eyelids all the way out. To get a very fine line, simply use a small angle brush and apply the eye pencil color to it. Take the brush loaded with color, and line the upper eyelid, going as close to the lash line as possible, working your way outward. Apply the pencil under the eye area only if the client doesn’t have a problem with under-eye circles or puffy eyes. Be careful to review the client’s eye shape to determine if this would be flattering or not.
Step 9: When trying to draw attention away from dark or puffy eyes, apply a luminizer or highlighter with an oval flat synthetic or foundation brush on the upper cheekbones fairly close to outer corners of the eye area. This can also be applied above the arch of the eyebrows, giving additional lift to the eye area.
Step 10: Before using mascara, apply an eyelash primer to the client’s eyelashes. This helps thicken and lengthen the eyelashes, and will help mascara wear better. Then apply mascara to the upper lashes with a disposable mascara brush. For lower eyelashes, many woman are better off applying mascara with a small detail brush. This will give just the right amount of mascara without making it looking clumpy or too heavy.
Step 11: Using a blush brush, apply a cream powder blush in a deeper warm neutral color underneath the cheekbones. Then use a blush brush to apply a slightly brighter sheer matte powder blush in peach on the apples of the cheeks.
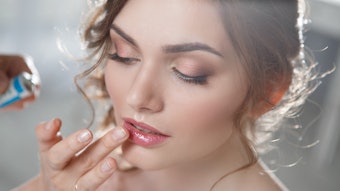
Step 12: For the lips, always look at the client’s natural lip color and shape. Never go dark if she has thin lips. For the most flattering natural lip color, don’t go more than two shades darker than her natural lip pigment. Simply apply an invisible lip liner all around the lip line to prevent any bleeding of lipstick or lip gloss. Then fill the lip with a flesh-toned lip pencil, and top it with a beautiful shimmery champagne color.
Cosmetic products and supplies used in this makeover included Beauty Addicts, Gabrielle, Mirabella and TIGI.
Teresa Paquin, owner/founder of Anika Skincare and Makeup, in Hudson, NH, is an acclaimed esthetician and freelance makeup artist who provides services in both skin care and makeup. Her extensive background and education include makeup design for film, television and print. She can be contacted at 603-595-0224 or [email protected].
