Eyebrows are all the rage—a current obsession. Clientele are after the perfect eyebrow, whether groomed, natural, arched or feathered.
The brow craze doesn’t seem to be leaving us anytime soon. Instagram alone hosts 8.6 million posts on the topic of the perfectly shaped brow. Add in Facebook feeds, videos, Tweets, Snapchats and Pinterest, and brows equate a huge opportunity for any skin professional. Every selfie or eyebrow shot a client takes, posts and tags you in represents you and your brand. Poorly sculpted brows reflect badly on your brand and reputation. Your ability to maximize the power of the brow for your clients will earn you loyalty, accolades and new clients, so get started sharpening your skills and make sure that your before and after posts reflect the best of your brand and attract new business. Here are the six steps you need to master the perfect brow wax.
Step 1. Artistry
Trends are fun, but there are also basic rules of balance and symmetry that make up the foundation of a perfect shape. You need to know where the eyebrow should start, arch and end as well as the perfect thickness. A client with a straight brow (like Jennifer Lawrence or Kendall Jenner) will have a hard time achieving a high arch. Conversely, naturally thick brows (like Lily Collins or Lucy Hale) that have a high arch would struggle to achieve the straight brow look. No matter what shape a client has or desires, the artistry remains the same. Two elements are vital: balance and symmetry. An eyebrow shouldn’t be too heavy in the front or at the tail end. The brow shouldn’t be too short or too wide between the brows. Once the basic law of shaping brows is mastered, it’s fun to be creative and try waxing different brow styles.
"Some clients prefer that you do not wax above the brow, so always ask."
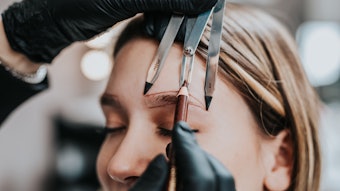
Currently, the most coveted eyebrow shape is full, but this must be designed to suit the individual’s face. The beginning of the brow is marked by holding a straight object, like a wax applicator, at the middle of the nostril to the brow. This is the beginning. Slant the stick to the middle of the eye. This is where the arch will be. The end of the brow is marked by slanting the stick to the corner of the eye. Once you determine where the eyebrow will begin, arch and end, it’s up to you to decide how thin or thick the brow will be. The art is in finding the best balance of trend and natural shape for each client.
Step 2. Consultation
The consultation should be a conversation about the desired eyebrow shape and any possible contraindications.
Shape. Communication about the desired shape needs to be clear. Sometimes, what you want to create and what the client asks for are light years apart. Manage expectations with your client. Most clients don’t really know what they want, they just want to look great. Will the brow be rounded or go to a peak? Will it gradually become thinner toward the tail end or be the same thickness across the whole brow? Will it have an ‘S’ shape or be more straight? I always hand the client a mirror and show them exactly what I want to do. You are the expert. You are the artist. After explaining what you would like to achieve, the client will usually agree.
Contraindications. Contraindications include health related issues such as high blood pressure or diabetes. Contraindications also include products being used such as retinols, salicylic acid, glycolic acid and really any product that is exfoliating for issues like anti-aging, hyperpigmentation or acne. This includes prescription and over-the-counter products. For example, a popular adapalene acne treatment thins the skin, making it difficult to tolerate waxing. A client may have no idea of the consequences of waxing in this case. A proper consultation will protect you and your clients’ brows.
In addition, a waxing waiver is helpful to list contraindications and obtain a signature from the client.
Even if this appointment is a return client, always consult with the client. Their skin care regimen may have changed, health issues may have arisen or maybe the shape of the brows simply needs to be adjusted.
Step 3. Prepare
Keep it clean. Always prepare the skin prior to waxing. First, wipe with an antibacterial solution. Then, depending on the manufacturers’ directions for the brand of wax you are using, apply either a pre-wax oil or baby powder. This will protect the skin while removing makeup, oil and perspiration. If using baby powder, use corn starch and never talc.
Step 4. Wax
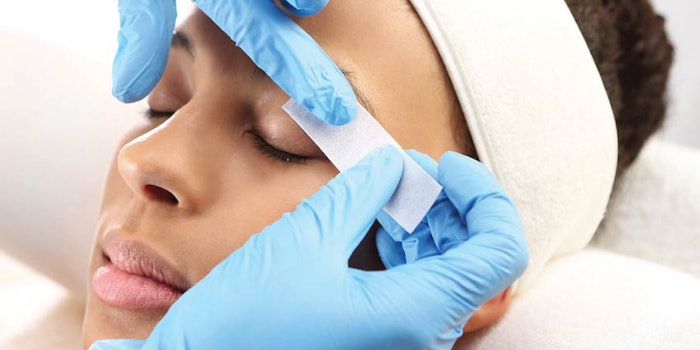
Start by brushing the brows up. Using a small spatula, apply a small amount of wax in the direction of hair growth to create the desired shape. Then swiftly remove in the opposite direction. Press on the area lightly to soothe the skin. Brush the brows down and repeat above the brow. Some clients prefer that you do not wax above the brow, so always ask. This should go without saying, but do not double dip your stick, ever.
Step 5. Shape
Now that the brows are waxed, shape them into the perfect work of art, worthy of the ultimate Instagram post! Use tweezers minimally to remove stray hairs and perfect the shape. You may need to create the perfect brow line, but some hairs are needed to fill in. Tell the client not to tweeze, and the eyebrow shape will fill in in a month or two. It will be worth the wait.
Due to age, hormones, over tweezing or health issues, eyebrows may become sparse and thin over time and may not fill in. The options are to fill them in with makeup, to recommend microblading or a serum that will stimulate hair growth. Trim any long hairs that are out of place, but ask first. If the client desires feathered brows, trimming the long hair will destroy the look. Make sure the brows match. Too many times eyebrows are individually beautiful, but are far from a matching set. Yes, they can be twins.
Step 6. Finish
Soothe the skin by applying an after wax soothing gel, a cold compress or aloe. I love to cocktail a pea size of hydrocortisone cream and a pea size of a serum containing salicylic acid to prevent post waxing breakouts. Finish the brow wax by filling them in with a pencil, powder or pomade. The client should look finished and complete.
Snap and Share
Your client will be thrilled with the perfect shape and finished look, often sharing a pic of their new eyebrows on social media. You should get in on the sharing too. It’s fun to post before and after photos of your work, just make sure you get permission from your client if their face is shown. You can bet these brows will be tagged and posted by your client. Your brow business will be trending and your business booming.


