Ahead of the release of Disney's "The Little Mermaid," mermaidcore is making a comeback!
Liana Thomson, the beauty expert at nails.co.uk, says, “Mermaidcore is a fashion and aesthetic trend that is inspired by the mythical creatures, mermaids. The new trend encapsulates iridescent colors, seashells and ocean themes. While it predates the new adaptation of 'The Little Mermaid,' the franchise's popularity has undoubtedly caused a spike in interest of the mermaidcore trend."
Nails.co.uk recently found that mermaid nails are the seventh most Instagrammable nail design EVER, after analyzing 100 nail trends and 8,645,678 nail selfies on the app.
They also found via Pinterest trends that searches for “mermaid nails” in the US, Great Britain and Ireland reached a yearly high on the app last week. The most popular age category for this search term on Pinterest was ages 25 to 34.
Now is the time to embrace your inner child and dive into "The Little Mermaid" hype. Rock a playful manicure with splashes of purple and green this summer!
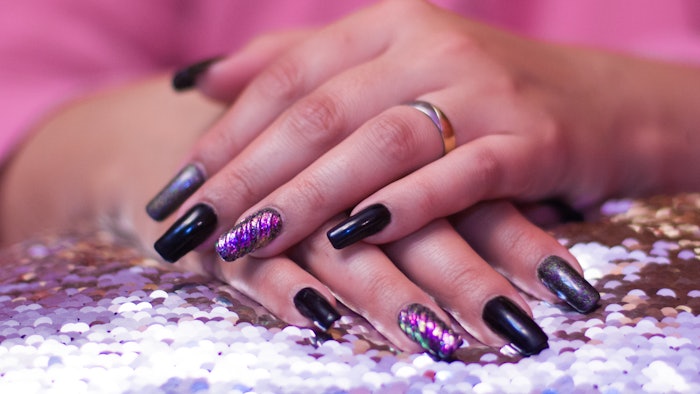
“As we eagerly anticipate the release of the new film this Friday, let Ariel's iconic outfit inspire your next nail look," Thomson says. "Take cues from her vibrant purple seashell bikini top and her mesmerizing mermaid tail, featuring a captivating greenish-blue shade. For the ultimate mermaid touch, don't forget to finish it off with a dusting of mermaid powder!"
Below, Thomson shares how to create a mermaidcore nail look for your clients that will have them wanting to go under the sea!
How-To:
- Dive into mermaid mode, and protect those precious nails: Start by removing any existing nail polish and filing the client's nails to a desired length and shape. Then, push the cuticles back to create a neater and more polished look, as well as promote healthy nail growth.
- Apply a base 'fin'-ish to your nails: Next, apply a base polish. This is a really important first step as it provides a layer of protection between the nail bed and the pigment in the colored polish to prevent the nails from being stained.
- Choose colors that make a wave: Select a range of ocean-inspired nail polish shades. If you are aiming for nails that are inspired by "The Little Mermaid," opt for shades of purple, green and blue to match Ariel’s seashell bra and iridescent shimmering tail. If you would like to mix colors, you can create an ombre effect using a sponge. Drip a small amount of nail polish onto some foil, making sure they’re close together but not touching. Use a toothpick or a similar tool to gently mix only the edges of each color together. Next, take a sponge and lightly dab it onto the mixed colors, starting from the tips of the nails and moving towards the cuticles. Use a Q-tip dipped in nail polish remover to clean up any colored polish that may have gotten on the skin, but be careful not to remove any of your ombre design from the nail bed.
- Seal with a no-wipe dazzling top coat: Apply a no-wipe gel top coat over the top of your colored nail polish. Cure your top coat under a UV or LED lamp, and follow the instructions provided with the gel polish to know the appropriate curing time.
- Unleash mermaid vibes and add your mermaid powder: Apply a small amount of mermaid powder to the nails by gently rubbing it into the nail's surface, starting from the cuticle area and working towards the tip. Repeat this process until you achieve a desired intensity of shimmer. Finish by buffing the nail surface with a clean soft brush to remove any excess powder.
- Scale it up with nail art: Scale up your mermaidcore nails by applying nail art to the ring finger. This could be done by using a nail art pen with a fine tip to draw on fish scales. Make sure to select a nail art pen color that contrasts nicely with the colors already on the nails. The pen should have a fine tip for better control and precision. A final layer of clear top coat can now be applied over the nail art to seal and protect the design.