Celebrated every June to memorialize the 1969 Stonewall Uprising in New York City’s Lower Manhattan, Pride Month honors LGBTQIA+ culture and achievements around the world. Synonymous with the rainbow color pattern, Pride Month (and every month!) is a great time to show love, allyship and support for the queer community through multicolored nail art and designs.
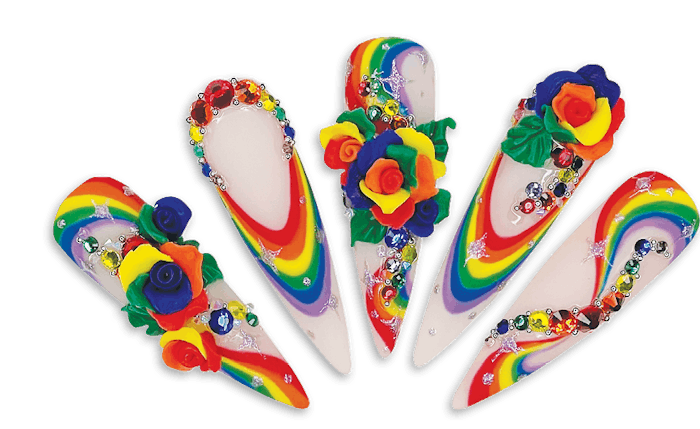
“I call this set ‘Let All the Colors Bloom,’” says self-taught nail designer Alejandra Sems (@ales.nail.artistry). “I love creating 3D roses, and with June being my birthday month and Pride Month, I knew the perfect way to celebrate both was with this rainbow rose design.”
Half Rainbow French With Rainbow Rose Detail
Apply two coats of your favorite nude/pink gel polish, and cure. Create a French line, using a rainbow color pattern of gel polish, curing after each line. Apply a matte top coat, and cure.
Apply glitter gel polish, and create dots with a dotting tool. With a short thin detail brush, create stars, leaving the smaller dots. Cure.
Create a 3D rose with 3D carving gel. First, apply a base coat to adhere the 3D carving gel to the nail, and cure. Use a silicone brush to mold petals and apply the carving gel, and cure.
Apply crystal glue then the crystals, caviar beads and pixie crystals to finish the look, and cure.
 Half Rainbow French With Rainbow Rose DetailCourtesy of Alejandra Sems
Rainbow Swirls Detail
With a long detail brush, create a swirling line using red gel polish. Cure. Continue the lines with gel polish in a rainbow pattern, making sure to cure in between the lines to prevent the colors from mixing. Apply a matte top coat.
Apply glitter gel to create dots with a dotting tool. With a short, thin detail brush, create stars, leaving the smaller dots, and cure.
Apply a central red crystal with crystal glue, and continue applying the rainbow pattern on both sides. Next, grab silver caviar beads, and apply them in between the crystals, and cure.
 Rainbow Swirls DetailCourtesy of Alejandra Sems
Rainbow Swirls With Rainbow Roses Detail
Create the same rainbow swirl effect, and cure. Apply a matte top coat, and cure.
Create a 3D rose with 3D carving gel. First, apply base coat to adhere the 3D carving gel to the nail, and cure. Use a silicone brush to mold petals, and apply the carving gel, then cure.
Apply glitter gel to create dots with a dotting tool. With a small detail brush, create stars, leaving the smaller dots, and cure.
Apply crystals, caviar beads and pixie crystals to finish the look.
 Rainbow Swirls With Rainbow Roses DetailCourtesy of Alejandra Sems