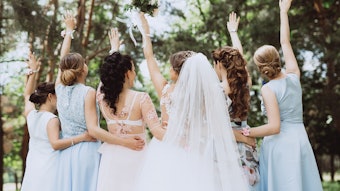
The movie Breaking Dawn: Part 1 from The Twilight Saga hit theaters recently. I have to admit, I’m a bit of a Twi-Hard. I’ve read all the books and watched all the films. I also teach bridal and special event makeup, so what could be a better tribute to the franchise than a step-by-step guide to recreating the character Bella Swan’s signature bridal look if your clients want to look like the heroine on their wedding day—or anytime.
Step 1: Neutralize any discoloration on the eyelid. This can be done using a little foundation, concealer or a flesh-toned eye pencil all over the eye area up to the brow. Set this using a translucent powder—this eliminates the need to use a flesh-toned eye shadow as a base color, and creates a more stable and long-lasting canvas for the eye makeup application.
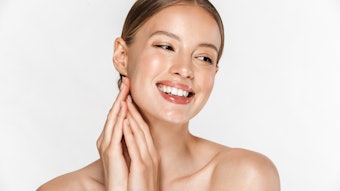
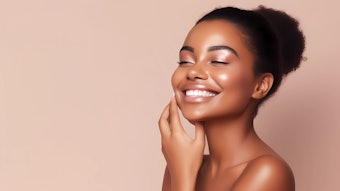
Step 2: Bella’s skin looks beautifully smooth and even-toned. This begins with using the correct complexion products. Always start with well-moisturized and primed skin; moisturizer and primer are so important to a finished makeup look ... even on oily skin. Foundation needs a correctly primed surface, like a painter’s canvas, to apply evenly and stay put. Experiment and decide which formulas work best with the foundation you use for clients. Consider using silicone-based foundations because they don’t sink into or clog pores. They’re also naturally water-resistant, so tears and perspiration have no effect on them. Because foundation is a personal thing, a customized choice needs to be made for each client; however, when you swatch a foundation on the jaw line, it must match the skin on the neck directly below it. If it doesn’t, you have chosen the wrong color and need to keep looking. Carry full-coverage foundations in your makeup kit in order to control how much coverage you use for a client—sheer, moderate or full. Having full-coverage products also eliminates the need to carry separate concealers.
Step 3: The eyelid should be washed with shimmering eye shadow that reflects light without sparkling. Start with a shimmering champagne color. Apply it to the very inner corner of the eye by the tear duct, and blend this color outward toward the center of the eyelid.
Step 4: Next, apply a honey-brown color for a beautiful warm tone and subtle glow. Apply the eye shadow starting at the outside corner of the eyelid, blending inward and also up into the crease. If applied correctly, these two colors should create a soft gradient effect of light to dark on the lid.
Step 5: The eye should then be softly defined and smudged. A powder kohl pencil will work great for this. Holding the pencil tip parallel to the lash line (not point in), begin drawing the line from where the inner lashes start, and graduate from thin to a thicker line as you reach the outer corner of the eyelid. This gives the eye a slight upward tilt, and keeps it looking fresh and open.
Step 6: Take a small eye shadow brush and diffuse the line by blending and smudging the liner into the lashes and blurring the hard edge. Now, using the same brush, set the liner with a matte taupe eye shadow. Use the same eye shadow to line the lower lashes three-quarters of the way in from the outside corner. Don’t go all the way to the inside corner in order to keep the eye open.
Step 7: The eyebrows must be groomed and filled in softly. Use an eye shadow that matches the client’s hair color and mix it with a little hard hair wax or brow wax to color and groom brows in one step.
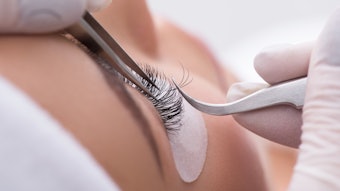
Step 8: Apply two coats of black mascara to the upper lashes, combing through them to remove clumps and separate lashes between coats. Don’t apply mascara on the lower lashes unless your client has light or blond lashes. If that’s the case, wipe the mascara wand off with a tissue, and use what’s left on the bristles to “dye” the light lashes without adding volume.
Step 9: Cheeks must look naturally flushed, and the only way to get this effect is with a mauve/rose-toned blush. It has to look like blood (which is a deep violet color before exposed to oxygen) has flooded the area and is seen through flesh tone. Use a cream/gel blush and blend it into the skin with a foundation brush that still has a slight residue of foundation on it. It tempers the color and makes it look very realistic.
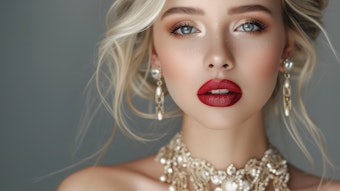
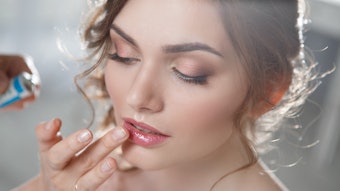
Step 10: Finally, focus on the lips, which, in this case, are very natural-looking but with a lovely, innocent shimmer. Define and fill in the lips entirely with a rosy/nude-colored waterproof lip liner pencil, let it set for a few minutes, and then top it off with a shimmering lip gloss in a soft peach with gold shimmer.
With more than two decades of experience in professional makeup artistry, multiple Emmy Award-winner Kevin James Bennett has secured his place as a leading industry expert. His diverse skills have garnered him accolades from boardroom to backstage and have impressed the viewers of his work across all media formats. As a beauty expert, Bennett has appeared on national entertainment shows including Access Hollywood, Entertainment Tonight and Good Morning America. His advice has also been featured in the pages of Vogue, Glamour, Elle, InStyle and more.
Cosmetic products and supplies from Audrey Morris Cosmetics, Colorlab, Crown Brush, Grafton Cosmetics, Illuminare and Your Name Professional Brands.